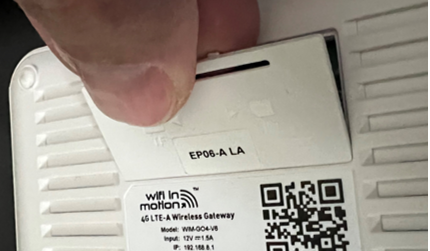
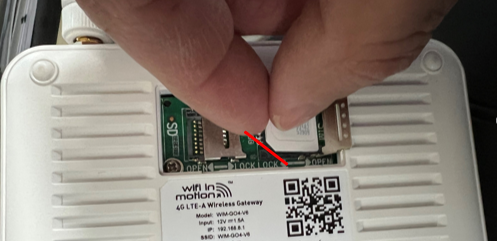
1. Find SIM access door (make sure the device is unplugged)
- On the back side of the GO4, find the door shown here in red.
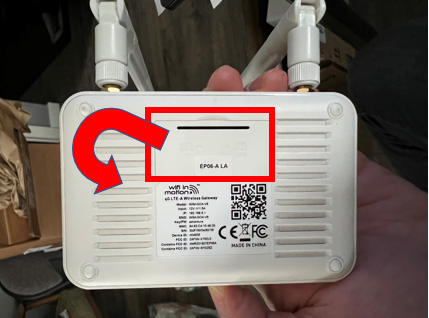
- Use your fingernail or a coin to open the door.
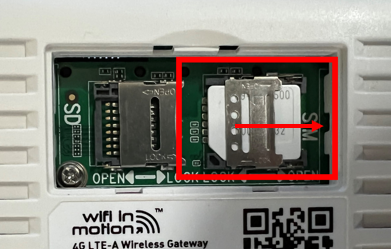
2. Unlock SIM lock
- Slide metal SIM lock to the right to unlock the SIM.
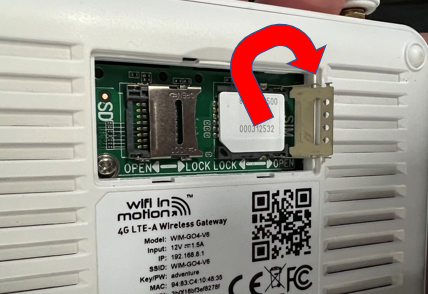
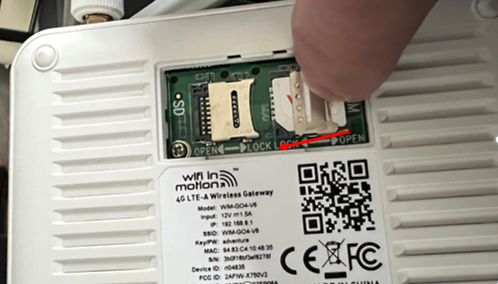
3. Flip open SIM lock.
- Flip SIM lock open and to the right to expose existing TruFreedom SIM.
- Remove the TruFreedom SIM (you may want to store it somewhere handy for possible future use).
4. Installation of RedFreedom SIM.
- Grab your RedFreedom SIM and remove it from the bag.
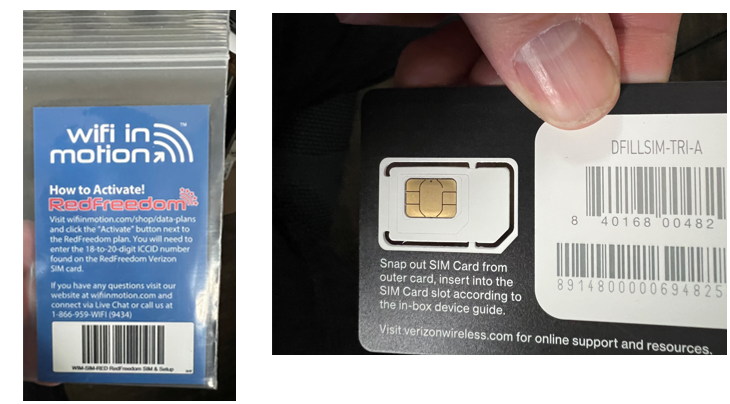
5. Remove Micro SIM
- Please note that this is a “tri-cut SIM” that includes three different size SIM cards; all in one card. Be sure to remove the combined portion of the card that includes the Micro and Nano SIM together as one piece.

6. Install RedFreedom SIM in GO4 unit.
- Lay the micro-SIM card so the metal portion of the SIM makes contact with the metal contacts in the GO4.
- Please note that the micro-SIM will have one corner that is notched and not square. The tray where you will lay the Sim card is also notched. Please match that corner to the SIM tray so it fits and lies flat.
7. Lock SIM door.
- To lock the SIM in place, slide the metal lock to the left (as shown in the image).
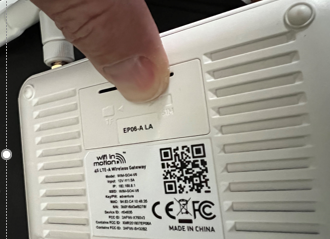
8. Replace SIM Access Door.
- Snap the door back in place as shown in the image.

9. Close the bracket and slide it gently to the left to lock it in place.
10. Screw in the antennas. Plug the power cable into the power port of the router.

11. Connect via Ethernet cable thru the LAN port or WiFI. Search the 2GHz WiFi called WIM-GO4-V6 and input the default password adventure, which is also printed on the bottom of the router.
12. Access the Web Admin Panel of your router. Open the web browser and visit http://192.168.8.1. Note: If your browser always redirects to LuCI (http://192.168.8.1/cgi-bin/luci), you can visit: http://192.168.8.1/index instead of http://192.168.8.1.
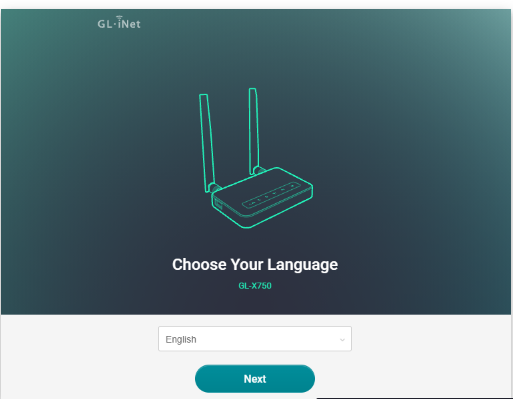
You will be directed to the initial set up of the web admin. Select Language and click on Next.
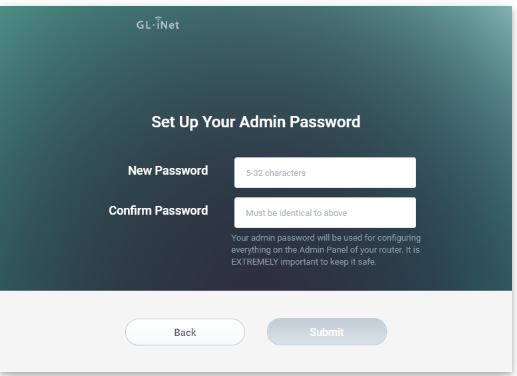
13. Set up your admin password which must be at least 5 characters (username is set to root). Confirm password and click Submit to proceed. This password is for the Web admin Panel and will not change your WiFi password.
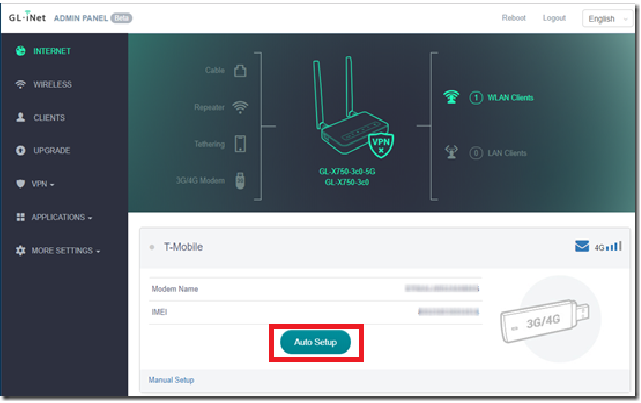
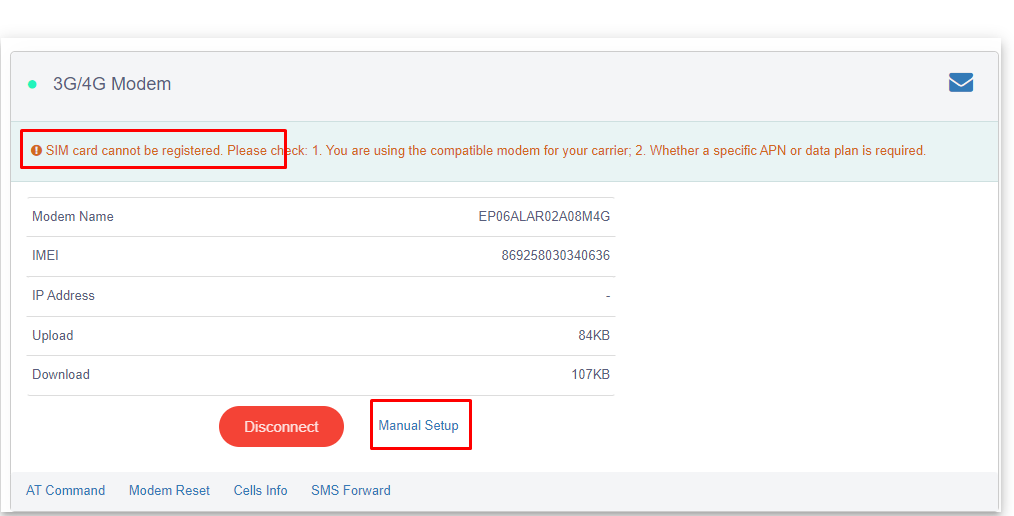
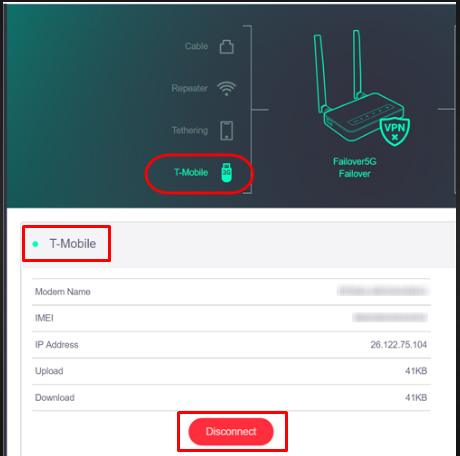
14. Login to the Web Admin Panel (192.168.8.1). Click Auto Setup. Auto Setup will try to build a cellular connection. It will show the Disconnect button if it is successful. In case Auto Setup fails or may show as "SIM Card not registered" please proceed with the next steps for the Manual set up.
15. Click on Manual Setup.
16. Fill in with the following information and click on Apply.
Device: /dev/cdc-wdm0
APN: vzwinternet
Auth: None
Proto: qcm
TTL: 65

17. Wait until you see the Disconnect button and a green dot beside Verizon.
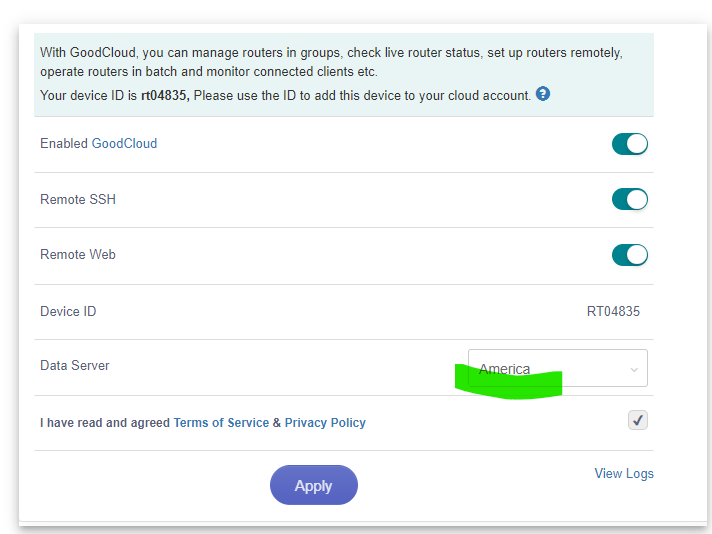
18. Click on Applications on the left hand side and select Remote access. Disable and re-enable the GoodCloud on router's Admin Panel. Select America for the Data server. Don't forget to click "Apply" button.
Reach out to one of our representatives if you need further assistance:
LiveChat - visit our website at www.wifiinmotion.com
Call- 1-866-959 WiFi (9434)
Email- support@your1point.com